Our Basement Renovation
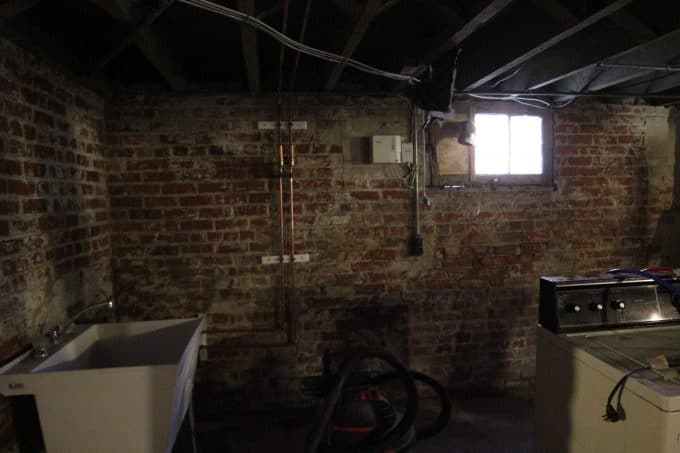
When Alex and I bought our house in 2014, I never imagined we could transform the basement into a functional, cozy living space. Ready for a wild transformation? We took this dingy, dungeon of a basement…
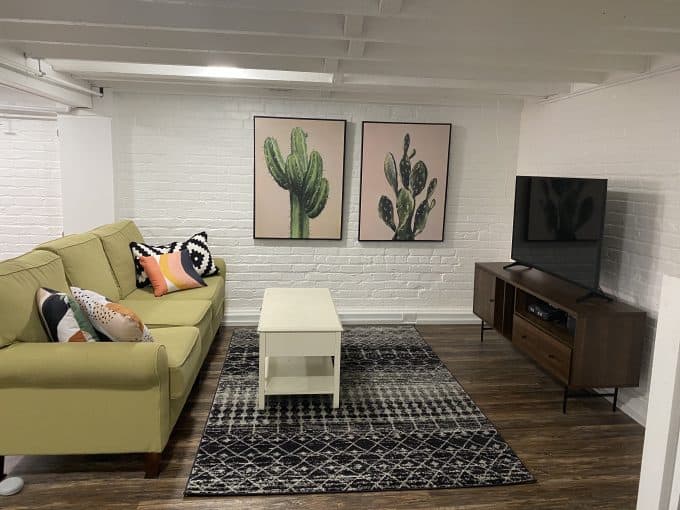
And transformed it into a playroom/living space!
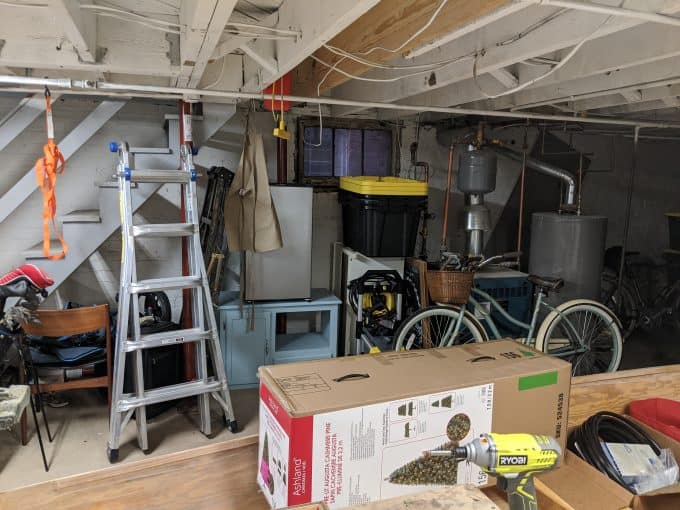
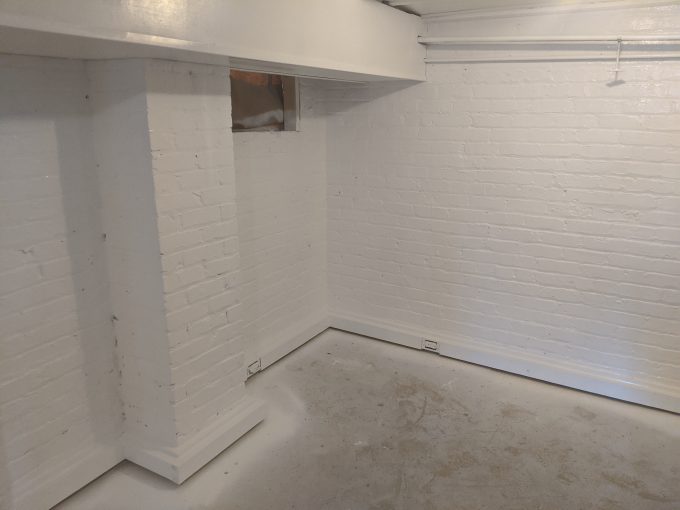
We knew the basement had potential, but it was hard to imagine a transformation based on what we started with. It looked pretty terrible, with dingy walls and a dirty concrete floor. We planned to use it as a woodshop and a storage area. This is what it looked like when we first bought the house:
Shortly after we moved in, we painted the walls with Drylok waterproofing paint, then gave the walls and ceiling a few coats of paint and covered the floor with this epoxy paint.
It wasn’t glamorous, but it cleaned things up and made it a better storage area. Alex used part of the basement as a workshop for other house projects, and it was nice to have a place to store out of season clothing and things we didn’t need on a daily basis. After a few years, it just became a disorganized storage area.
As we finished up our foster parent training at the end of 2019, we started dreaming about having a finished living area, rather than a catch-all of rarely used junk. My dad had offered to renovate the space for us, and we finally decided to take him up on it. (Note: I say “we” in this blog post, but I have to admit that I had very little to do with the project! My dad and Alex were really the only ones doing the work!)
My dad actually began the process in February before we had kids. (Alex and I had two kids move in with us in early March, and once everything shut down, we desperately needed more room in the house.) My dad and Alex worked tirelessly to finish the space as quickly as possible, and I love how it turned out.
The Unseen Fixes
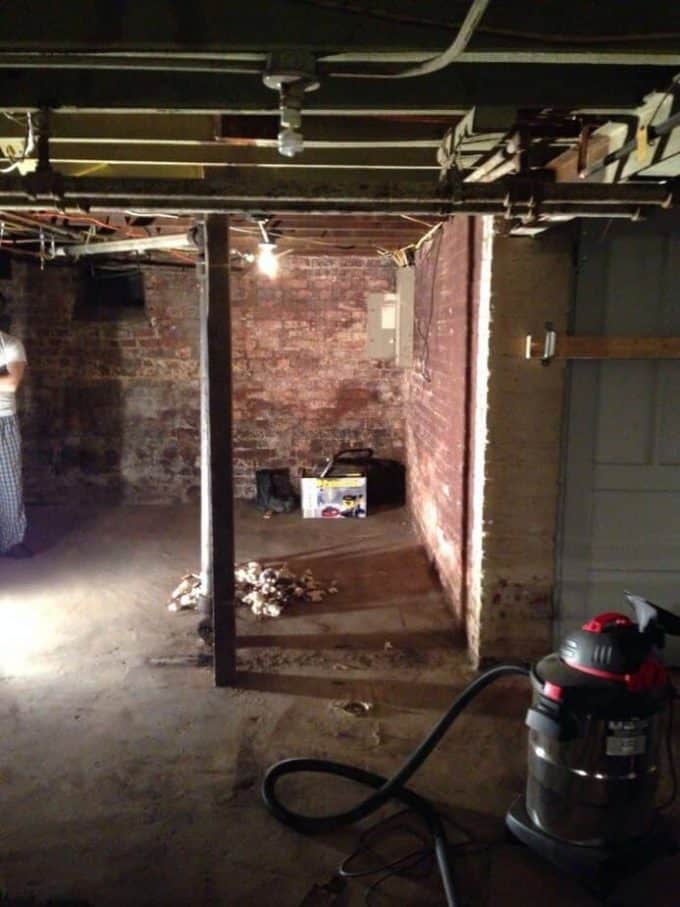
Before I dive into the flashy before and after pictures, I want to mention that my dad did so much work that you might not notice in the photos. He rerouted gas lines, electrical lines, and plumbing fixtures, so they are less noticeable. He moved a support beam to open up our stairway and make it less narrow. He did so many projects to make the space as beautiful and functional as possible.
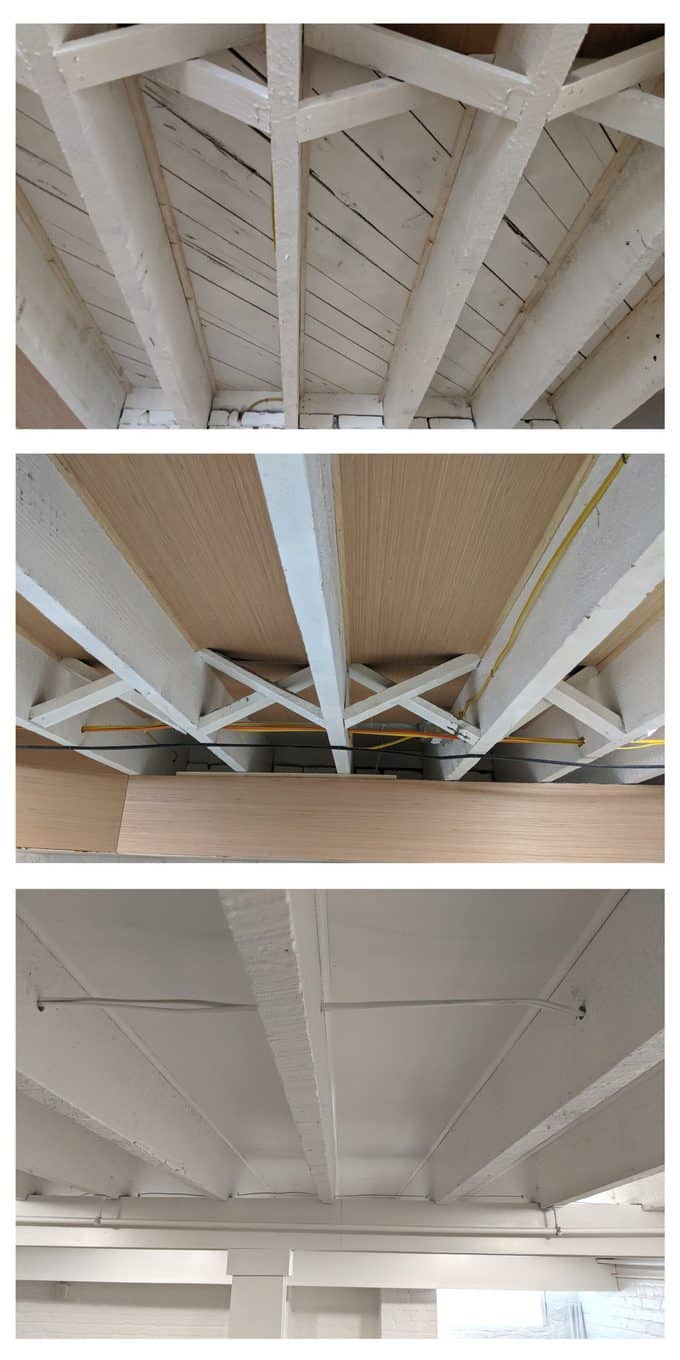
How We Finished the Basement Ceiling
No matter how much paint we used, the ceiling wasn’t going to look clean, because you could see the knots, nails, and gaps in the floorboards. It wasn’t easy, but Alex and my dad put up thin sheets of plywood between each of the beams and trimmed it with quarter round. It gave the ceiling a much cleaner look. It was a painstaking process, but I love how it turned out.
The Stairway
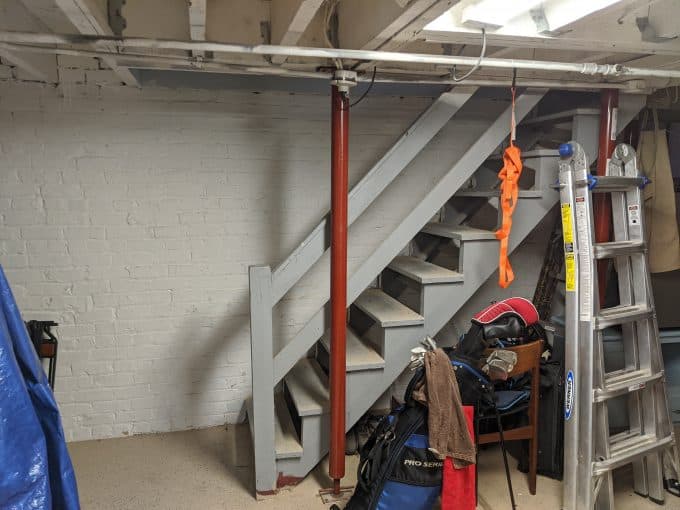
As I mentioned, Alex and my dad moved one of the support beams over to widen the stairway. One of the things we didn’t like about the basement was that the stairs were super narrow and steep. (It made it tricky to carry a laundry basket up and down the stairs!) So my dad widened the area and rebuilt a brand new stairway that was slightly less steep. I love the way the painted stairs turned out, and the stairway itself is much safer now!

The Door & Windows
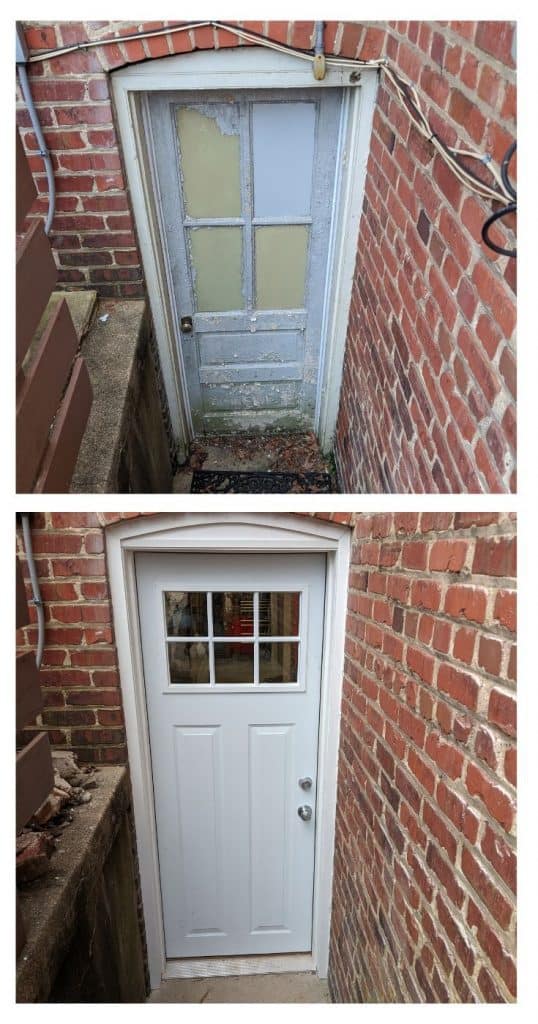
When we bought our house, the owners “replaced” the basement door. They really just painted over a plexiglass door, so the paint quickly peeled, and it looked awful. It’s an odd size, so we had to order a custom width, and then my dad had to trim the bottom of it to make it fit. But I love the way it looks, and the windows give us a little more natural light.
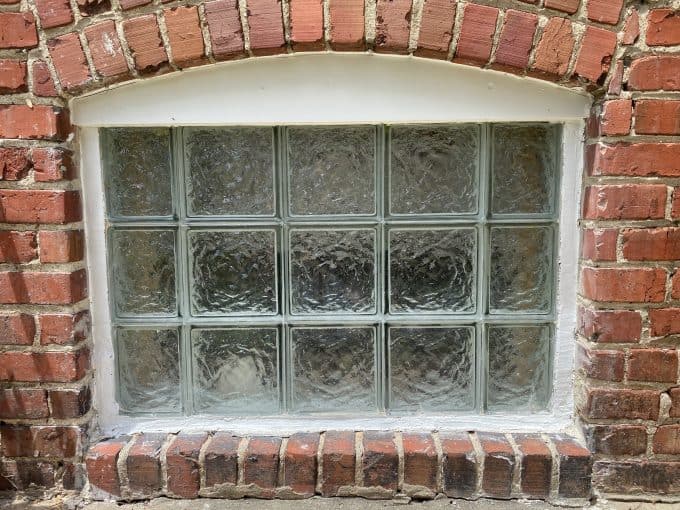
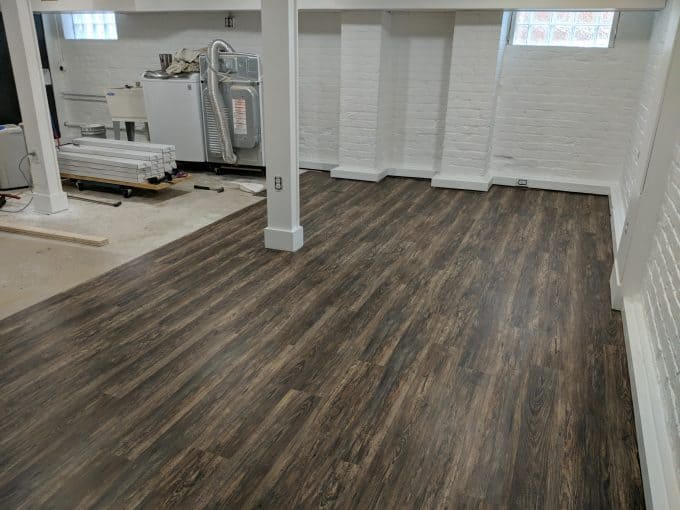
The basement windows were the original wooden windows, and they were dirty and rotted. My dad replaced them with glass block windows, and I love the way they turned out. We ordered two with vents (one for the dryer and one for a future bathroom), and the third is solid glass. They give us so much more light, security, and privacy!
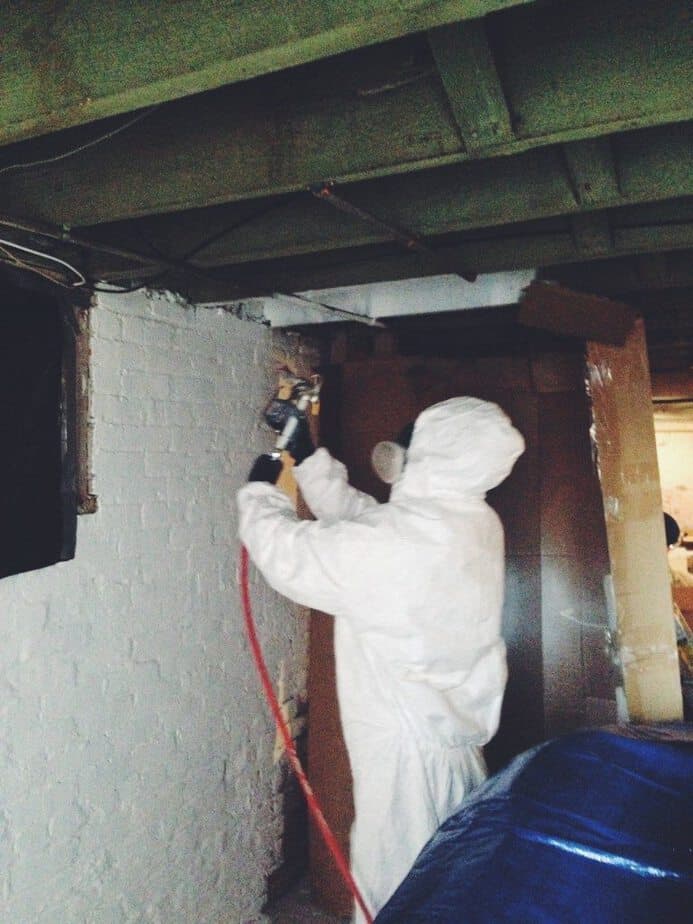
How We Painted the Basement
There were a few areas where our original coats of paint had chipped, so we scraped that off and touched up those areas with more Drylok paint. Then we painted all of the walls and ceilings using Valspar paint and a paint sprayer. It would have been nearly impossible to paint the ceilings by hand, so a paint sprayer was a must.
It took three coats, and we went through nearly 13 gallons of paint. We used a roller to touch up spots on the ceilings that didn’t get fully covered. Painting made such a huge difference to give us a clean surface.
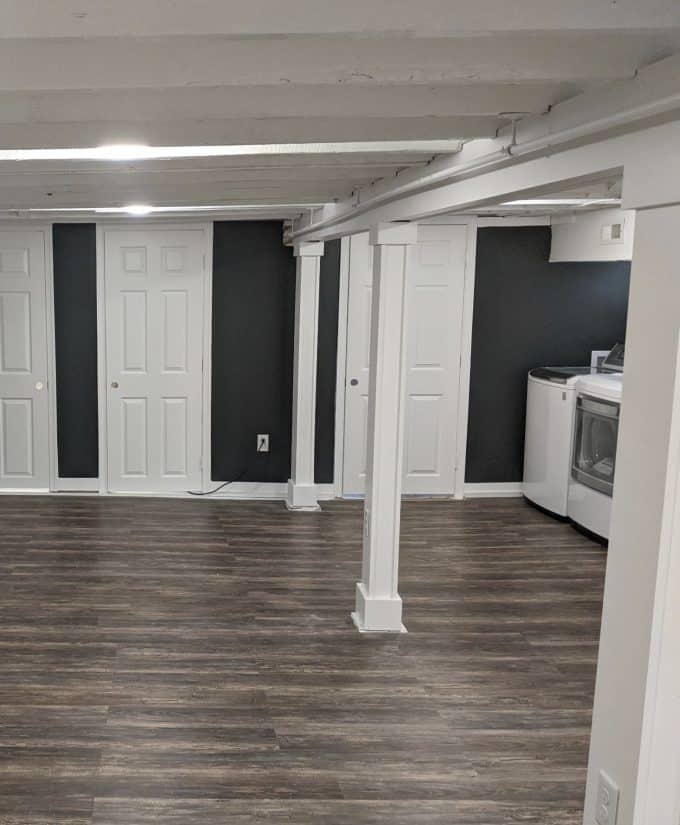
Dividing the Space
We kept the back part of the basement as an unfinished storage area, for Alex’s tools, brewing equipment, and out of season clothes. We had to put in three separate doors since we’re eventually planning to add a bathroom, which will be between the unfinished storage area and the exit to the backyard.
Basement Challenges
Our basement has a low ceiling. Most areas are around 6 ½ feet high, although the main support beam running through the middle is only about 6 feet. We knew we couldn’t do anything to change this, but painting everything white makes the ceiling feel a little higher.
The floor isn’t very level. There are some high spots and low spots, and there wasn’t much we could do about it. We used luxury vinyl flooring that would “float” (here’s the exact one we got, the finish is Stagecoach) and it worked well. When we first laid it, without any furniture in the room, you could feel some of the low spots. But now that we have furniture put down, it’s barely noticeable. We chose this floor because it’s 100% waterproof, so if water does make its way down to our basement, it should be ok.
The room has six support columns, and most of them couldn’t be moved to other areas. To make them a little less ugly, we wrapped them with wood to give them a more decorative look. We also added electrical to some of the columns, so they’re functional, too!
The Finished Space
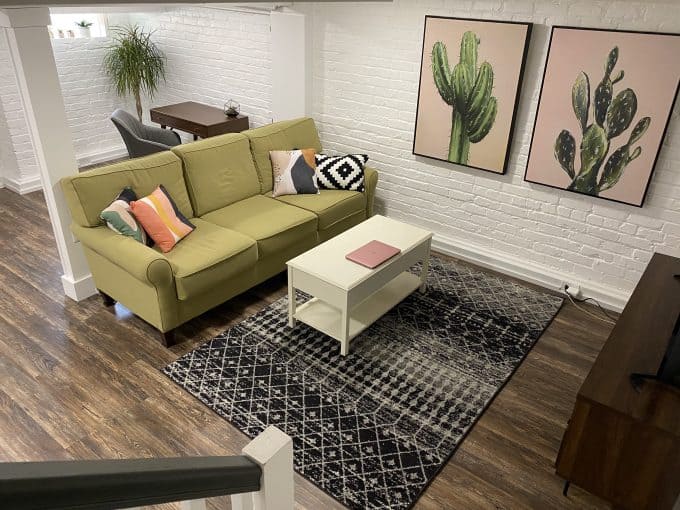
It turned out so much better than I expected. I knew it would be nice to have a little more space, but I never imagined it would be a room I really enjoyed spending time in! Now that we have kids, it’s nice to have more open space for them to play.
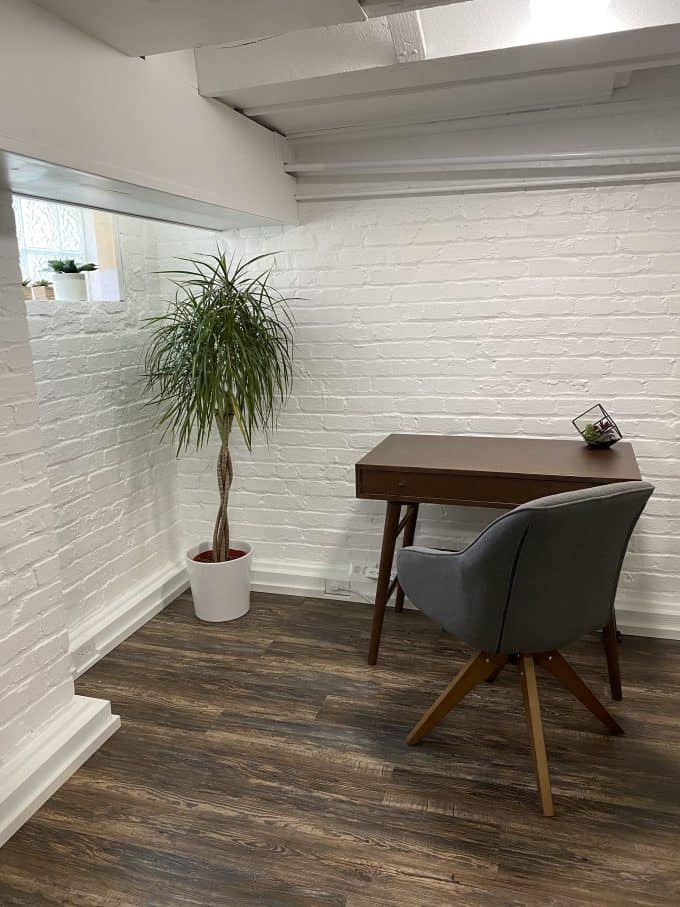
Since Alex and I are both working from home now, we added a desk for a second workspace. We also added a lot of storage. Our main level doesn’t have any closets (like literally no coat closet, no broom closet, no linen closet, nothing), so we desperately needed more storage. We found cabinets that fit perfectly under the soffit, which has given us space for cleaning supplies, sports equipment, and other hard-to-store items.
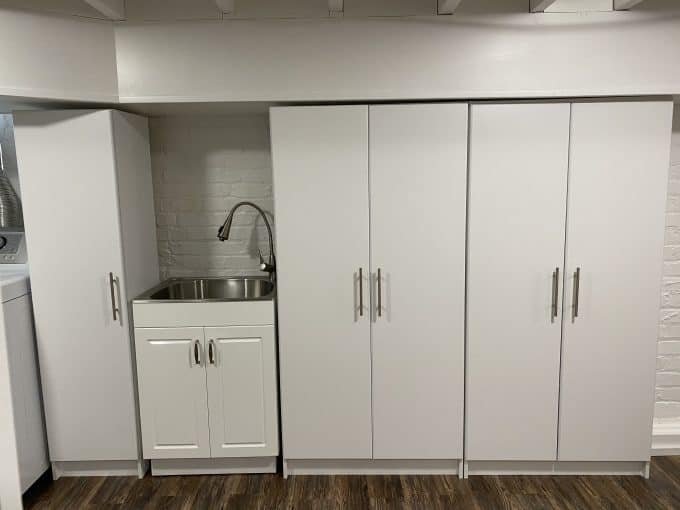
We managed to find these cabinets at Lowes, which were exactly the right height and width for the wall with the washer & dryer. They’re perfect next to the new laundry sink!
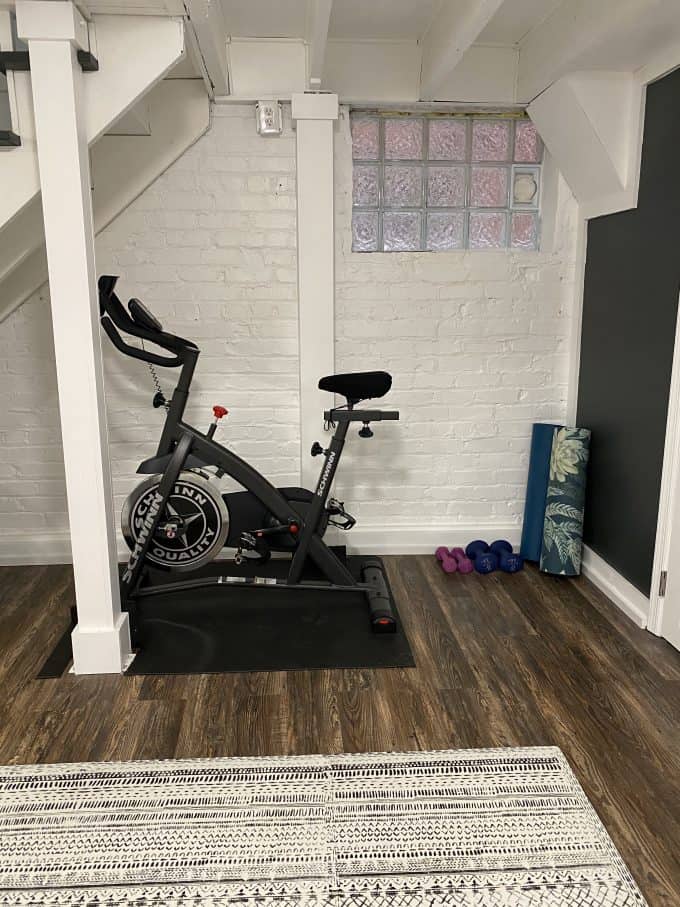
Our workout area moved to the space next to the stairs. The exercise bike fits perfectly under the stairs, in what would otherwise be unused space. We can store all of our hand weights and yoga mats under the stairs and pull them out when we want to exercise. We also got one of these playmats from House of Noa, which looks like a rug, but it’s actually one of those puzzle-piece style foam mats. As the baby starts learning to crawl, it’s nice to have a soft spot for her!
Having this space has been an immense blessing, especially since we’re currently a family of four!
Can’t get enough before & after photos? Check out our backyard transformation!

Beautiful work! Glad I found your remodeling ideas. I’m going to do my basement like yours except, I would paint the ceiling black due to low ceiling. Thanks for sharing your beautiful remodeling ideas. Aloha
Good luck, Maggie!
I absolutely love what you did with this old basement! It’s an inspiration for me in our old farmhouse basement. This is a crazy request, but is it possible to shoot a video or add a layout of how this all looks downstairs? We are trying to envision if this is possible in our own basement, but based on your pictures, it looks like maybe you have more space or a better layout than we do. Thank you again for the inspiration!!
I was thinking the same and found a video on her Instagram page.
It’s honestly so beautiful! I love how bright the room looks with the new paint. We just had our basement flood and after a huge water damage restoration project, we are ready to start remodeling to get the basement of our dreams. Thanks for the inspiration as the task seems really daunting.
I love how bright the basement lighting is! The lighting with the white walls makes it feel so open and airy. It’s easy to forget that this beautiful space is underground. What lighting (fixtures, types, brands) did you use?
Beautiful transformation. I am not sure what part of the country this is but what did you have to do to keep the basement warm during the cold months without insulation?
This is absolutely beautiful, I just got my basement waterproofed and I’m now looking to do a basic remodel. I have low ceilings and an unlevel cement floor. I want to do something very similar, exposed painted ceilings, floors, laundry space with doors, powder room and enclosed storage area. I love the new stairs, I have the same problem… I would love the see the complete space, just to get a little idea of what I’ll need to budget..
While the reno is BEAUTIFUL I fear you could have a problem down the road with painting below grade, old brick. Painting does not allow the brick to breath and shed moisture. Spalling begins to happen and the brick begins to crumble. Cross my fingers for you. That being said the ceiling was a great idea and looks great!
Thank you for sharing this information our basement rennovation. It was useful and interesting. You indeed have written it in a layman way so that anyone can understand and work accordingly. You have done a great job.
Thanks a lot to you for sharing our basement renovation here, these kind of ideas are were much needed. I really appreciate that you have provided the data too, really appreciative and useful blog for us. Looking for more!! If possible visit this website https://www.precisebuilders.co.nz/ to gain more idea or tips on the same.
Hello, thank you for sharing this article it will be really helpful for me to understand about the basement renovation in detail. I appreciate your step for choosing this topic. Great article!!
You guys did such an incredible job with this renovation! Would you be willing to share how much it cost you to do? Thank you!! I love it!